Hosting Unity WebGL in Angular & ASP .net core
I decided to write this blog because I couldn't find a good source out there for the best way to configure a Unity WebGL build to be served by an asp .net core web app with Angular. I hope it helps you.
Heads up - Part 2 of this code is available now if you want to get extra fancy with Two way communication between Angular components and Unity WebGL build
Source files & example
TLDR: The source code is available in GitHub.
You can view the application in action here.
There are a million bits of configuration and some trials and tribulations with load times so I thought i’d share my experiences here focusing in particular on:
Optimal Unity build configuration.
Brotli or GZip Compression in .net core for the .unityweb files.
Hosting in an Angular project
Removing the mobile warnings
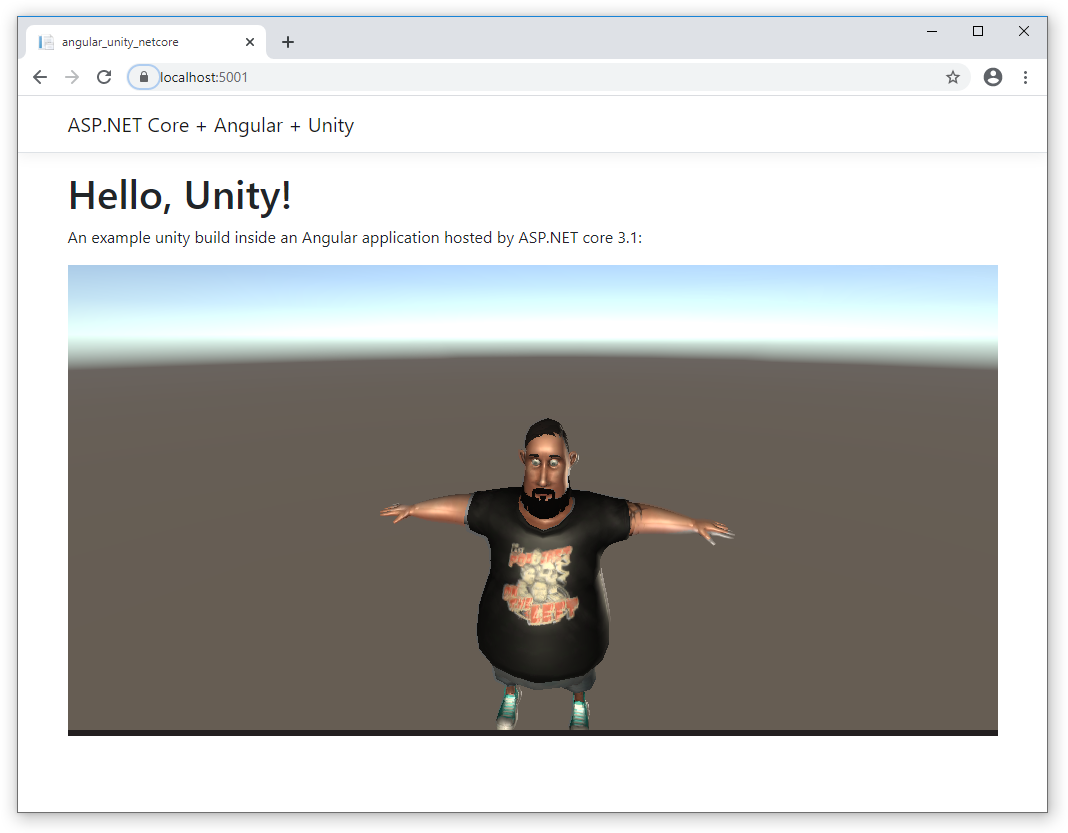
We’ll be using a really simple scene for this build which has a rather unflattering 3D model of me and a simple LookAt and RotateAround method on the camera.
The scene
We’ll be using a simple unity scene all of the files are available here.
Optimising the Unity build
First up, let’s look at optimising the unity build. When deploying to hardware like iOS, Android or Windows we don’t need to worry too much about unused packages but I’ve found that leaving them in when creating WebGL builds can cause memory issues, especially in iOS where the sandbox for decompressing and compiling the web assembly files is pretty small.
So the first step is to remove everything you don’t need. Open the package manager in Unity (window->Package manager) and be ruthless. Cull cull cull.
Next we need to publish our build, take a look at the package settings, ideally you want to set the “other settings” section to limit the build to just what you need for your game. For example if you’re not going to allow iOS you could turn off the Auto Graphics API and just build a WebGL 2.0 version but all of these settings are specific to your build. Since I’m going to allow the build on iOS I’m leaving Auto Graphics API turned on.
What you do need to consider is compression. Head over to the publish settings and turn exceptions off, data caching on and set the compression format to either GZip or Brotli. There’s a good (but old) thread in the unity forum about optimizing WebGL load times that explores Brotli & GZip. What I will say though is that Brotli offers a higher compression rate and has native support in Chrome & Firefox and so if you’re targeting bleeding edge browsers, choose Brotli.
Your publish settings should look something like this, in my experience disabling exceptions makes the startup times much faster:
Go ahead and build it, and store the files for later or if you want, just nab my files from here.
Setting up the Angular .net core project
Create a new ASP.NET Core Web Application in visual studio then choose the Angular template like the image below:
Now copy over the build output from your unity build into the assets directory. There should be two folders (Build & TemplateData) and an index.html file. You don’t really need the index file as the unity build is going to be hosted in an angular component and sometimes the TemplateData isn’t output (I dunno why but it doesn’t seem important).
If you can’t be bothered creating a build, just steal mine from GitHub.
Your solution should look like this
If it doesn’t then I’m sorry that you’re lost.
By default the index.html file produced by Unity relies heavily on the UnityLoader.js file to load the web assembly files. Since we’re going to need to do the same we need to import the build into our scripts.
Open the angular.json file and add a script reference to the unity loader under like the following image:
Creating the Unity Angular component
Now we need to create a new Unity angular component to house our build. I used the Angular CLI to create and wire the component using the command below:
ng g c Unity --module app
Change the default selector name from app-unity to just unity in unity.component.ts.
The component itself is pretty light. It’s just a container element for the unity build so I’ve places the CSS directly on the element. We’re also going to use the bootstrap loader to show the progress. Open unity.component.html and set the markup:
<ng-container *ngIf="!isReady">
  <div class="progress">
    <div class="progress-bar"
         role="progressbar"
         [style.width.%]="progress*100"
         [attr.aria-valuenow]="progress*100"
         aria-valuemin="0"
         aria-valuemax="100"></div>
  </div>
  <hr />
</ng-container>

<div #unityEl id="gameContainer"
     style="display: block; width: 100%; min-height: 0px; margin: auto"></div>
A couple of things to point out:
#unityEl is to allow us to bind to an ElementRef viewchild in the component.
The gameContainer ID is needed for the unity loader.
The progress of loading is a value between 0-1 and so we multiply it by 100 to get the percentage loaded for our progress bar.
The progress bar is wrapped in a container with the condition !isReady so will disappear once the game build is loaded.
Now head on over to the unity.component.ts and add up the following code:
import { Component, OnInit } from '@angular/core';

@Component({
  selector: 'unity',
  templateUrl: './unity.component.html',
  styleUrls: ['./unity.component.css']
})
export class UnityComponent implements OnInit {

  gameInstance: any;
  progress = 0;
  isReady = false;

  constructor() { }

  ngOnInit(): void {
    const loader = (window as any).UnityLoader;

    this.gameInstance = loader.instantiate(
    'gameContainer',
    '/assets/Build/CraigGilchristUnity.json', {
    onProgress: (gameInstance: any, progress: number) => {
        this.progress = progress;
        if (progress === 1) {
          this.isReady = true;
        }
      }
    });
  }

}
Let’s break this down…
We need an instance of the unity loader which will have been added to the DOM by our changes to angular.json earlier. We get this with the following line:
const loader = (window as any).UnityLoader;
Next we instantiate the game with the unity loader passing in three things:
The element ID of the container (gameContainer)
The location of the JSON file outputted by Unity (CraigGilchristUnity.json)
Options including a onProgressCallback
this.gameInstance = loader.instantiate( 'gameContainer', '/assets/Build/CraigGilchristUnity.json', { onProgress: );
The onProgress callback gives us two thing, the game instance and the progress loaded. If we had messaging between our unity build and the Angular app we’d utilise the game instance, for now though all we care about is the loading progress which we capture in a local variable for our loading bar and also set the status of isReady once loaded:
(gameInstance: any, progress: number) => {
        this.progress = progress;
        if (progress === 1) {
          this.isReady = true;
        }
      }
This post doesn’t cover messaging between Angular and Unity but if you like I can do that in another tutorial, just hit me up on Twitter.
Adding the component to the page
For the page itself, we’re going to just use the standard bootstrap structure, feel free to clear out the navigation etc and your home.component.html should just be a simple container with the unity component in like so:
<h1>Hello, Unity!</h1>
<p>An example unity build inside an Angular application hosted by ASP.NET core 3.1:</p>
<unity></unity>
Go ahead and hit F5 in Visual Studio. You should get something like this:
So, we’re done right? Not quite.Run the application again with the developer tools open and you’ll see a warning in the console:
“You can reduce your startup time if you configure your web server to host .unityweb files using brotli compression.”
The problem here is that we specified we’d be using the brotli compression format in our Unity build but our server (in our case the .net core web application) isn’t serving the .unityweb files with the right encoding.
If you open up the network tab you’ll see that indeed there is no encoding response header on any of the .unityweb files. Let’s fix that
Serving .UnityWeb files with the Brotli encoding
In order to properly serve compressed files with brotli encoding we need to add the middleware to the ASP.NET pipeline but first we need to tell ASP.NET Core the correct mime type to return the unityweb files.
Open up your startup.cs file and replace the call to app.UseStaticFiles() within the Configure() method with the following code:
var provider = new FileExtensionContentTypeProvider();
provider.Mappings.Remove(".unityweb");
provider.Mappings.Add(".unityweb", "application/octet-stream");
app.UseStaticFiles(new StaticFileOptions
{
    ContentTypeProvider = provider
});
This will configure the correct mime type for the unityweb files. Once the Angular App gets built in —prod mode the app will also use the call to UseSpaStaticFiles() too so let’s replace that call too:
app.UseSpaStaticFiles(new StaticFileOptions
{
    ContentTypeProvider = provider
});
Now really early in the pipeline we want to ensure that the compression middleware is added. Head up right to the top of the Configure() method and add a new line:
app.UseResponseCompression();
Now that we’ve added compression to the pipeline and we’ve told the web app how to serve unityweb files, we need to configure the compression.
At the top of the ConfigureServices() method add the following code:
services.Configure<BrotliCompressionProviderOptions>(options => options.Level = CompressionLevel.Optimal);
services.AddResponseCompression(options =>
{
    options.MimeTypes = new[] {
        "application/octet-stream",
        "application/vnd.unity"
    };
    options.Providers.Add<BrotliCompressionProvider>();
    options.EnableForHttps = true;
});
This sets the options for the BrotlieCompressionProvider and then adds Brotli as the provider to the compression pipeline.
The EnableForHttps is important because many browsers (Chrome, Firefox and soon Edge) only allow Brotli compression over HTTPS.
Run the application again and check your network tab in the developer tools. You should see that we’re now successfully serving the .unityweb files with the correct encoding.
.NET Core web application serving brotli compressed files.
That’s it, we’ve done it. We’ve configured a .NET core app which hosts an Angular app which serves a Unity WebGL build (that’s a mouthful).
Now one final thing…
Removing the mobile warning from Unity WebGL
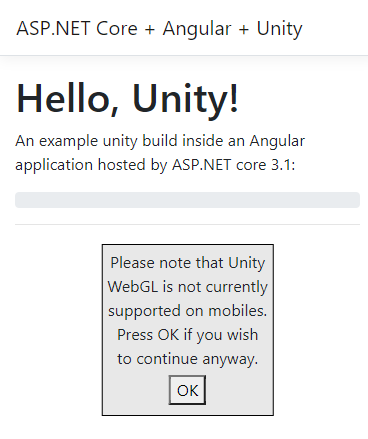
If you open the page on a mobile device you get this ugly warning proclaiming that “Unity WebGL is not currently supported on mobiles”.
Unity WebGL is not currently supported on mobiles
(It is)
This isn’t strictly true. While WebGL 2.0 isn’t supported on mobile Safari (iOS), we published our Unity build with “Auto Graphics API” turned on which means that the web assembly will run on OpenGLES2.0 (WebGL 1.0) which works on most versions of Mobile mobile Safari.
The warning you see actually comes from a line in the UnityLoader.js file. The problem with it is that it’s huge and heavily minified so it’s difficult to find. Open the file up and look for the following code:
UnityLoader.SystemInfo.hasWebGL?UnityLoader.SystemInfo.mobile?e.popup("...")
This ternary uses a previously determined variable UnityLoader.SystemInfo.mobile, all we need to do to disable that test is replace that with false to look like this instead:
UnityLoader.SystemInfo.hasWebGL?false?e.popup("...")
You can also just pinch my version of unityloader.js from GitHub where I’ve already done this.
That’s a wrap. I hope this has helped you out. If you’ve got any questions then give me a shout on Twitter or hit up the comments below.


